Mastering Homemade Labneh: Your Easy One-Ingredient Guide
Imagine a creamy, tangy delight that rivals the richest cream cheese, yet boasts the refreshing tang of Greek yogurt, all made with just one primary ingredient from your fridge. Welcome to the world of
homemade labneh, a Middle Eastern staple that's surprisingly simple to create and incredibly versatile. Once you discover the ease and satisfaction of crafting this delectable yogurt cheese yourself, you'll wonder why you ever bought it pre-made. Forget expensive specialty store versions – your kitchen is about to become a labneh haven!
In many households across the Middle East, labneh isn't just a treat; it's a daily essential, a testament to its deep cultural roots and unparalleled deliciousness. Often described as a thicker, bolder cousin to Greek yogurt or a tangier, healthier alternative to cream cheese, labneh offers a unique flavor profile that brightens any dish. From spreading it on toast to rolling it into delightful
Labneh Balls, its culinary possibilities are endless. This guide will demystify the process, turning you into a labneh master in no time.
What is Labneh? Unveiling the Middle Eastern Delight
At its heart, labneh is a thick, fresh yogurt cheese, celebrated for its smooth texture and distinctly tart, tangy flavor. It’s a staple in Middle Eastern cuisine, treasured for its ability to serve as a base for vibrant spices, a refreshing dip, or a substantial component of any mezze platter. While its texture is often compared to that of cream cheese, labneh's taste is closer to a very concentrated, extra-strained Greek yogurt, offering a bright acidity that sets it apart.
Many people wonder about the difference between labneh, Greek yogurt, and even cream cheese. Let's clarify:
- Labneh vs. Greek Yogurt: Both are strained yogurts, but labneh takes the straining process a step further. While Greek yogurt is typically strained once, labneh undergoes a more extended straining period, often twice as long, resulting in a significantly thicker, denser, and tangier product.
- Labneh vs. Cream Cheese: Cream cheese is made from a combination of cream and whole milk, curdled and then strained. Labneh, on the other hand, is exclusively made from strained yogurt. This difference in origin gives labneh a lighter feel and a more pronounced tangy, cultured flavor compared to the richer, milder profile of cream cheese. However, in a pinch, cream cheese can be an acceptable substitute for its texture, but it won't replicate labneh's unique tang. For a deeper dive into their distinctions, check out Labneh Explained: Thicker Than Yogurt, Better Than Cream Cheese.
- Labneh vs. Laban: These terms are often confused, but they refer to distinct products. Laban is a drink made from fermented milk, often thinner and sweeter than traditional labneh. Labneh, as we know, is a much thicker, strained yogurt cheese.
The beauty of labneh lies in its simplicity and inherent health benefits, being derived from cultured yogurt. It's naturally high in probiotics, offering a wholesome and delicious addition to your diet.
The Magic Behind Homemade Labneh: Just One Ingredient (Almost!)
The "one-ingredient" claim for
homemade labneh might sound too good to be true, but it's remarkably accurate. The star of our show is humble yogurt.
To achieve the best results, you'll want to select a high-quality, plain, natural yogurt. Here’s what to look for:
- Full-Fat Yogurt: While you can use low-fat or even non-fat yogurt, full-fat (whole milk) yogurt will yield the creamiest, most luxurious labneh. The higher fat content contributes significantly to its rich texture and mouthfeel.
- No Additives: Opt for yogurt without added sugars, artificial sweeteners, or flavorings. You want the pure, unadulterated tang of the yogurt to shine through.
- Greek Yogurt or Regular Yogurt: Either can work, but remember that Greek yogurt is already partially strained, so it might yield a slightly thicker labneh faster. Regular natural yogurt will work beautifully but may require a longer straining time.
The "almost" part of the one-ingredient guide refers to two crucial, yet optional, supporting elements:
- A Pinch of Salt: While not strictly necessary for the straining process, a tiny pinch of salt mixed into the yogurt before straining enhances the flavor of the finished labneh, bringing out its natural tanginess.
- Straining Tools: These are essential! You'll need a cheesecloth (multiple layers are best), a clean nut milk bag, or even a very fine-mesh kitchen towel. You'll also need a large bowl to collect the whey and a colander or sieve to support the cheesecloth.
The transformation itself is fascinating. As the yogurt strains, water (whey) is gradually removed, concentrating the milk solids and resulting in a denser, richer, and more flavorful product. Expect to yield roughly half the weight of your initial yogurt in finished labneh. For instance, 2 kg (about 70 oz) of yogurt will typically produce around 1 kg (about 35 oz) of creamy labneh, leaving you with 1 kg of nutritious whey – don't throw it away! (More on whey later).
Your Step-by-Step Guide to Perfect Homemade Labneh
Making
homemade labneh is primarily a waiting game, but the hands-on preparation is minimal. Here’s how you can do it:
Method 1: Starting with Store-Bought Yogurt (The Easy Way)
This is the most common and simplest approach for achieving delightful labneh.
1.
Prepare Your Straining Setup:
- Line a colander or fine-mesh sieve with several layers of cheesecloth (or a clean nut milk bag/kitchen towel). Ensure there's enough overhang to gather and tie.
- Place the lined colander over a deep bowl. The bowl will catch the whey as it drains, making sure the bottom of the colander doesn't sit in the liquid.
2.
Mix and Pour the Yogurt:
- In a separate bowl, stir a tiny pinch of salt into your chosen yogurt. This is optional but recommended for flavor enhancement.
- Carefully pour the salted yogurt into the cheesecloth-lined colander.
3.
Strain and Wait:
- Gather the edges of the cheesecloth and tie them securely with kitchen twine, forming a neat pouch. Alternatively, you can simply fold the edges over the yogurt.
- You can either let the colander sit directly on the bowl in the refrigerator, or for a traditional method, tie the pouch to a kitchen cupboard handle or a strong hook, allowing it to drip freely into the bowl placed underneath.
- Place the entire setup in the refrigerator. This is crucial to prevent spoilage, especially if straining for longer periods.
- Strain for at least 6 hours for a soft, dip-like consistency. For a thicker, spreadable labneh or for shaping into labneh balls, strain overnight or for up to 24 hours. The longer it strains, the more liquid is removed, resulting in a firmer, denser labneh.
4.
Unwrap and Enjoy:
- Once your desired consistency is reached, carefully unwrap the cheesecloth. You’ll find a beautifully thick, creamy mound of labneh.
- Transfer it to an airtight container. Your homemade labneh is ready to be enjoyed!
Method 2: Making Yogurt from Scratch First (For the Ambitious Cook)
For those who enjoy a full DIY experience, you can start by making your own whole-milk yogurt before proceeding to strain it.
1.
Make Your Yogurt:
- Using whole milk and a yogurt starter (either a powdered culture or a few spoonfuls of plain natural yogurt with live cultures), follow your preferred method for making homemade yogurt. This typically involves heating milk, cooling it, introducing the starter, and fermenting it for several hours.
- Once your homemade yogurt is set and chilled, proceed directly to Step 1 of "Method 1: Starting with Store-Bought Yogurt" to strain it into labneh.
Tip for Success: Don't discard the leftover whey! This nutrient-rich liquid is a byproduct of the straining process and can be used in smoothies, for baking (it adds tenderness to bread and pastries), as a base for fermentation, or even to water acid-loving plants.
Elevating Your Labneh: Crafting Irresistible Labneh Balls
Once you’ve mastered the art of making creamy
homemade labneh, a whole new world of culinary creativity opens up, especially with
labneh balls. These bite-sized treasures are not only visually appealing but also a fantastic way to preserve your labneh and infuse it with bold Mediterranean flavors.
To create these delightful morsels:
- Ensure Firm Consistency: Your labneh needs to be strained for at least 18-24 hours (or even longer) to reach a firm consistency that can be easily rolled without being sticky.
- Roll into Balls: Using lightly oiled hands, scoop small portions of labneh (about 1-inch diameter) and roll them into smooth spheres.
- Flavor Infusion: This is where the magic happens! Roll the labneh balls in an array of vibrant herbs and spices. Popular choices include:
- Za'atar: A quintessential Middle Eastern spice blend (thyme, sumac, sesame seeds).
- Dried Mint: Refreshing and aromatic.
- Sumac: Adds a beautiful crimson color and a tart, lemony flavor.
- Red Pepper Flakes: For a touch of heat.
- Finely Chopped Fresh Herbs: Parsley, dill, or chives.
- Crushed Pistachios: For a nutty crunch and visual appeal.
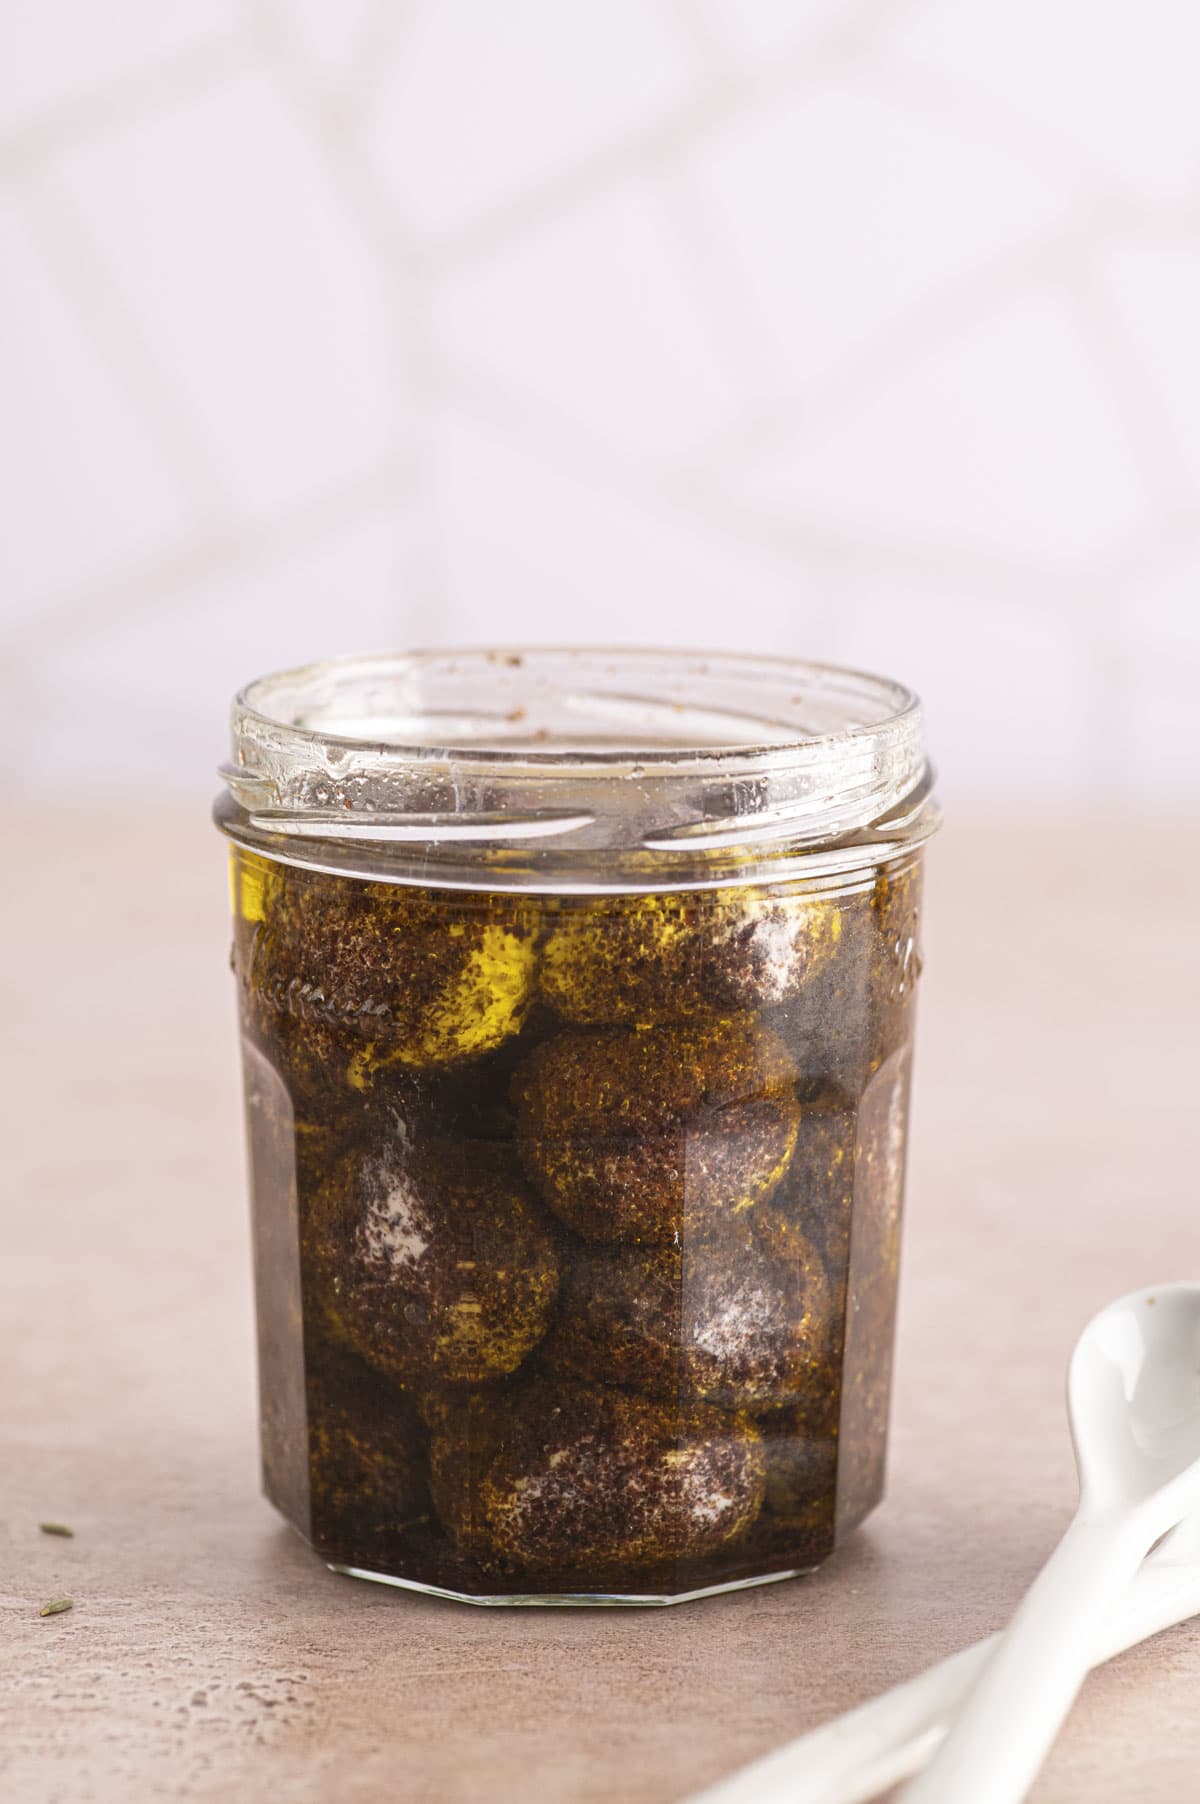
- Preservation in Olive Oil: Arrange the coated labneh balls in a clean, airtight jar. Pour high-quality extra virgin olive oil over them, ensuring they are completely submerged. This not only preserves the labneh but also infuses the oil with delicious flavors, which can then be used in dressings or for dipping.
Stored in olive oil, labneh balls can last for several weeks in the refrigerator, making them an excellent make-ahead appetizer or a thoughtful gift. They are perfect additions to a cheese board, a vibrant mezze platter, or simply enjoyed as a sophisticated snack.
Beyond the Ball: Creative Ways to Enjoy Your Homemade Labneh
While labneh balls are undeniably charming, the versatility of your
homemade labneh extends far beyond.
- The Classic Dip: Serve your labneh in a shallow bowl, drizzled generously with extra virgin olive oil, a sprinkle of za'atar or paprika, and a few fresh mint leaves. Enjoy with warm pita bread, fresh vegetables, or olives.
- Breakfast Booster: Spread labneh on toast, bagels, or pita. Top with honey and nuts for a sweet treat, or with sliced cucumbers, tomatoes, and a sprinkle of salt and pepper for a savory start.
- Salad Enhancer: Dollop labneh onto green salads, grain bowls, or roasted vegetable dishes to add a creamy, tangy element.
- Sandwich Spread: Replace mayonnaise or cream cheese in your sandwiches and wraps for a lighter, tangier alternative. It pairs beautifully with grilled vegetables, falafel, or chicken.
- Dessert Delight: Believe it or not, labneh can be fantastic in desserts. Sweeten it lightly with honey or maple syrup, add vanilla extract, and serve with fresh berries, fruit compote, or a sprinkle of granola.
Experiment with various toppings and pairings to discover your favorite ways to incorporate this delightful yogurt cheese into your culinary repertoire.
Conclusion
Making
homemade labneh is a rewarding culinary adventure that is surprisingly easy, incredibly budget-friendly, and offers endless possibilities for customization. With just one core ingredient and a little patience, you can transform simple yogurt into a luxurious Middle Eastern delicacy. Whether you enjoy it as a creamy dip, a vibrant spread, or as elegantly flavored
labneh balls preserved in olive oil, your homemade creation is sure to impress. So, grab that yogurt, set up your straining station, and prepare to embark on a journey of flavor that will elevate your meals and delight your palate. Enjoy the rich, tangy taste of labneh, knowing you crafted it yourself!